Difference between revisions of "Ross Bayer"
| Line 1: | Line 1: | ||
| − | |||
| − | |||
| − | |||
| − | |||
| − | |||
| − | |||
| − | |||
| − | |||
| − | |||
| − | |||
| − | |||
| − | |||
| − | |||
| − | |||
| − | |||
| − | |||
| − | |||
First Quarter Proposal | First Quarter Proposal | ||
| Line 97: | Line 80: | ||
As of this point my draft is still under construction, but I have made a lot of progress and plan to have it finished very soon, meaning the next 2 - 3 weeks. As of now my current draft looks like this ==> | As of this point my draft is still under construction, but I have made a lot of progress and plan to have it finished very soon, meaning the next 2 - 3 weeks. As of now my current draft looks like this ==> | ||
| + | |||
| + | ---- | ||
| + | ---- | ||
| + | |||
| + | Second Quarter - Java | ||
| + | |||
| + | I plan to learn the basics of the java programming language. I will use a few different books on the subject. This will carry over into the thrid and possibly fourth quarter. | ||
| + | |||
| + | Goals: | ||
| + | |||
| + | 1. Hello, World! | ||
| + | : This is the first program that I have learned. The basic program most everyone begins with, it's purpose: print "Hello, World!" on the terminal window. Heres the code. | ||
| + | |||
| + | <code> | ||
| + | public class HelloApp{ | ||
| + | |||
| + | } | ||
| + | |||
| + | </code> | ||
Revision as of 15:43, 12 January 2011
First Quarter Proposal
My Advanced Topics project for the first quarter is to build an easy to update website for my TaeKwonDo studio using a CMS(Content Management System). Through this project I will expand my knowledge about CSS and HTML, learn a little PHP, and Teach myself to use a CMS.
My 10 goals for this project during the first quarter are as follows:
1. Chose a CMS (Content Management System)
- I had first learned of CMSs from Mr. Bui. He mentioned them to me when I had decided to build a site for my TKD school. From then on I went looking. There were many choices available,but I decided on Joomla. Mainly because Wordpress and ModX didn't fit my needs for a simple website meant for my TaeKwonDo studio. Things like Wordpress were mainly coded for creating blogs and the template constructions were far above my level and ModX didn't seem very user friendly. So lastly there was joomla, who as it so happened is very easy to create templates for.
2. Install Xampp (to create a localhost)
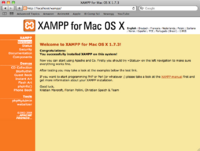
- I installed Xampp for Mac by downloading it from here and moving it to the suitable directory, more commonly know in mac as the applications folder. Onece it was set up, I tweaked with a few settings. Once everything was up and running I opened MySQL and made a database for my site. (this was used later for the Joomla Setup)
3. Install Joomla
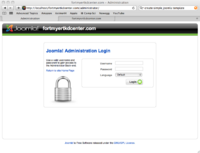
- SInce I am using a Mac, the installation of Joomla was very simple and easy, unlike my first attempt on a linux machine. All there was to do was download the file from the Joomla website, which I found with the wonderfully powerful tool known as google, and download the joomla zip file. Once I extracted the Joomla folder I renamed it and moved to to the XAMPP folder then to htdocs and there it resides. Once complete, I opened a Safari window(Safari is an internet browser for the mac) and typed in the address
/localhost/FILENAME/installation] and went through the instructions, which had me provide the database name I made earlier and my admin password. Once I was done I deleted the install folder from the Joomla file and went to/localhost/FILENAME/administrator. There I signed in with my admin password and off I went.
4. Search for template
- Joomla is a wonderful program that offers plenty of templates to add your content to, if you search hard enough. I spent about a week on this and found a template I liked, but was unsure of the licence. I didn't want to infringe on copyright so insteaed I began development on my own Template.
5. Template Constuction
- I began construction on my Joomla Template at this and aslo this page. They gave me all the basics I needed. First the simple HTML code and a sample css file to go with it. Since I was already pretty familiar with HTML and CSS, I found the template framework to be comprehensible. I of course added a few things like new colors and background images. I formatted it and molded it until I had the basic shell of a website that I envisioned.
6. Graphics Synthesizing
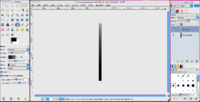
- After the basic template had been established I quickly went about creating my graphics, or at least most of them. I made the shadow for under the header and the header background. Both were created using an amazing open sourced, cross-platform program known as GIMP. Each were gradients of a dark black to a light grey and each is repeated across the x-axis over and over. Once I completed these graphics and put them in place.
7. Template Tweaking
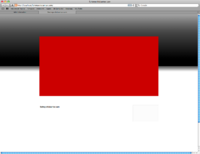
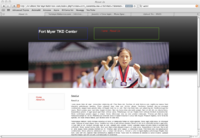
- Because I had the basic frame of my website I began to make it look nice. I added some more divisions to group things together visualy. The CSS is constantly evolving along with my images. At the moment I have place-holders and preliminary images and have lots of work left to do. Things like the menu must still be added to the proper place. I want to add pictures to the front page. In the image on the left the big red box will eventually hold a frame and a set of images that randomly cycle through.
8. Dummy Content and Placeholders
- The next step in my theme process, is to add dummy information, which could also be called placeholder information. Things like Lorem Ipsum, the mumbo jumbo of computer languages(meant to fill space, has no real purpose). I will also add a few placeholder images to give the site a more professional look.
9. Menu Management
- In every website I have ever built the menu always ends up as the most frustrating part of construction. I normally put it off until the end. Luckily for me, this time around was a little different. After having looked around joomla for a while and gotten a feel for the controls I began playing around with the main menu. I added another page "About Us" linked to an Article I called "About Us". The Page was fine, but the menus no where in sight. So in my
index.phpdocument I adjusted a few joomla plugin tidbits and there it was. All that was left was to add style and I was done, with little to no pain at all.
10. Re-Adjusting & More Tweaking
- I ended up not liking a few sections of my template and decided to do a bit more construction on them, I added a new image, played with some spacing, and resized a few components. This template still has a little work left and I know I will spend as much time as necessary to make it properly, present it to Master Camacho and tweak even more if required.
As of this point my draft is still under construction, but I have made a lot of progress and plan to have it finished very soon, meaning the next 2 - 3 weeks. As of now my current draft looks like this ==>
Second Quarter - Java
I plan to learn the basics of the java programming language. I will use a few different books on the subject. This will carry over into the thrid and possibly fourth quarter.
Goals:
1. Hello, World!
- This is the first program that I have learned. The basic program most everyone begins with, it's purpose: print "Hello, World!" on the terminal window. Heres the code.
public class HelloApp{
}
